Managing Contacts
Contacts are individual people — clients, leads, prospects, or anyone else your team works with. Each contact record stores personal details, address, notes, and links to companies, tags, deals, tickets, and more.
Creating a Contact
Open the Contacts list
Navigate to Contacts in the sidebar to see all your contacts.
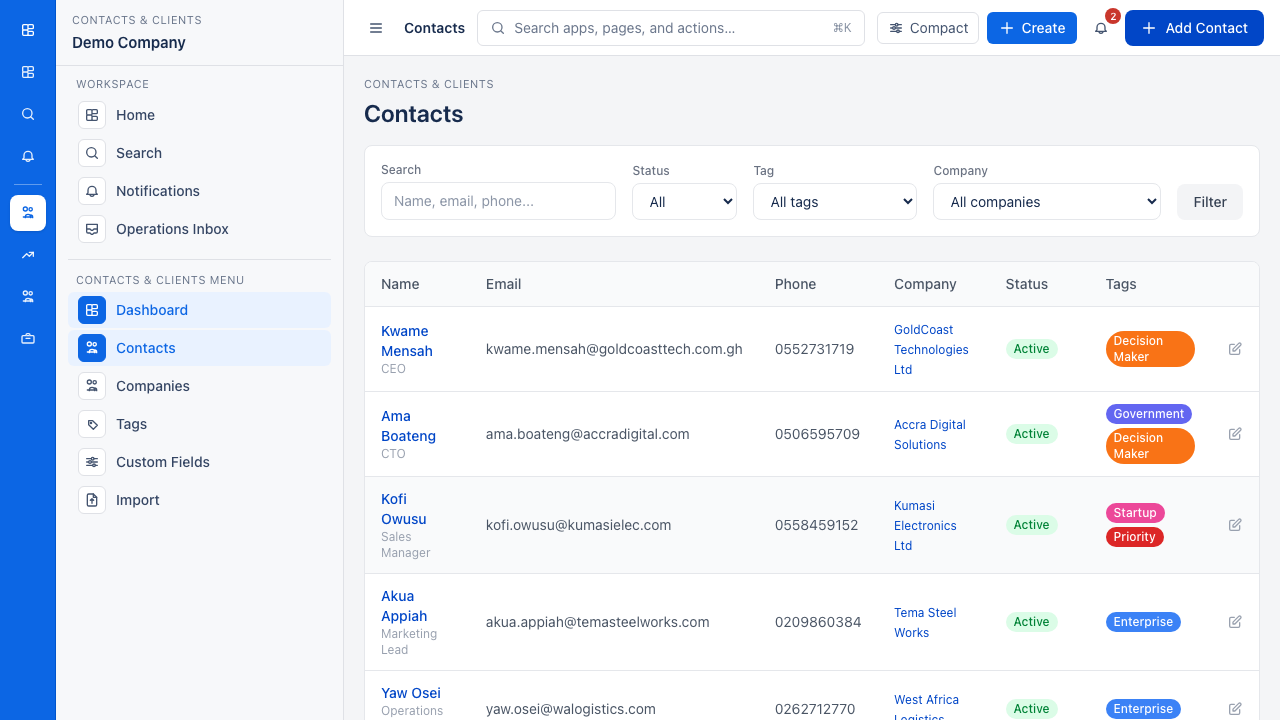
Click Create Contact
Click the Add Contact button to open the new contact form.
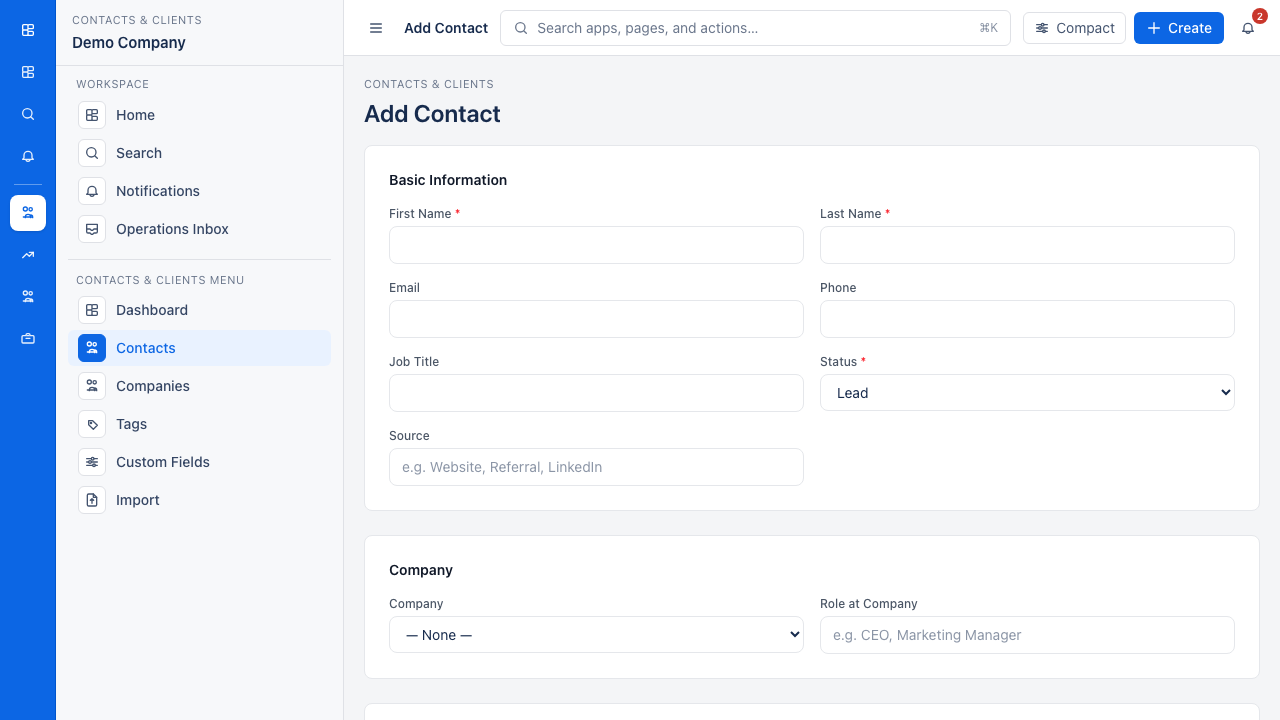
- Navigate to Contacts & Clients in the sidebar.
- Click Add Contact.
- Fill in the required fields — First Name and Last Name.
- Optionally add email, phone, job title, source, and a full address.
- Set a Status:
active,inactive,lead, orprospect. - Optionally link the contact to a Company and set their role at that company.
- Add any Tags to categorise this contact immediately.
- Fill in any Custom Fields your admin has configured.
- Click Save.
The Source field (e.g., "referral", "website", "trade show") is free text. Keeping it consistent makes filtering easier later.
Searching and Filtering
The contact list supports several ways to narrow results:
- Search — matches across name and other indexed fields
- Filter by Status — show only leads, prospects, active, or inactive contacts
- Filter by Tag — limit the list to contacts carrying a specific tag
- Filter by Company — show all contacts linked to a given company
- Sort — click any column header; the direction toggles between ascending and descending
All filter and sort parameters persist in the URL, so you can bookmark or share a filtered view.
Viewing a Contact
Click any contact to open their detail page. The page is organised into tabs:
- Overview — key fields, assigned user, tags, and companies
- Interactions — chronological log of calls, emails, meetings, notes, and tasks
- Deals — linked sales pipeline deals (requires Sales Pipeline module)
- Tickets — linked support tickets (requires Support & Tickets module)
- Quotes — linked quotes (requires Sales Pipeline module)
- Employee — linked HR employee record (requires SyneraHR module)
Editing a Contact
- Open the contact detail page.
- Click Edit.
- Update any fields, including companies, tags, and custom fields.
- Click Save.
Changing the linked company replaces the previous company link. A contact can only have one primary company at a time.
Logging Interactions
From a contact's detail page, use the Log Interaction form to record activity:
| Type | When to use |
|---|---|
| Call | Phone conversations |
| Emails sent or received | |
| Meeting | In-person or video meetings |
| Note | Any free-text memo |
| Task | A follow-up action with an optional scheduled date |
Each interaction records a subject, optional description, optional outcome, and an optional scheduled date. Interactions display in reverse chronological order on the contact page.
Task interactions can be marked complete using the Mark Complete action, which records a completed_at timestamp. Interactions can also be edited or deleted individually.
Deleting a Contact
Open the contact, click Edit, then use the Delete option at the bottom of the form. Deletion is permanent and cannot be undone.
Deleting a contact removes the record and its interaction history. If the contact is linked to deals or tickets in other modules, those links will be broken.
See also: Companies & Organisations to group contacts under company records, Tags & Segments to label and filter contacts, and Import & Export to bulk-import contacts from a CSV file.